Coffee

9165 readers
2 users here now

☕ - The hot beverage that powers the world!

Coffee gadgets - It's always great to learn about new gadgets. Please share your favorite hardware or full setups. It might inspire newcomers to experiment!

Local businesses - Please promote your local businesses. If you are not the owner of the business you are promoting, kindly ask the owner if it's okay. It would be great if the business has a physical store to include an exterior or interior shot.

founded 2 years ago
MODERATORS
1


I've had a Gaggia Classic for a few years and over the last few months I've been having issues with the flow from the group head.

I think it might be an issue with the solenoid valve. There was some guidance I saw online about flicking rapidly from the group head to the steam wand, as this forces water through and clears any blockages. And yes this does seem to work - if I rapidly flick the switches the water suddenly flows a lot faster from the group head. But it's not a permanent fix.

I've descaled it several times. Is there something else I can do, or does the valve need replacing?

2
3
 
 
  1. How much caffeine is in a double shot of espresso.
  2. Are the effects of caffeine cumulative or concurrent
4


No, I don't own this one. I just love the interlocking handle design.

By Prodotti Stella. https://coffeecompanion.com/2011/10/stella-neapolitan/

Manufacturer's stamp somewhere on the handle

Unfortunately, Stella doesn't make these anymore. According to an Etsy listing for one of these, they stopped making them around the year 2000. A Wayback Machine search on their website prodottistella.com doesn't list any coffee makers as far back as the earliest capture in 2001.

5
6
7
8


How come there is no real "wacky experimentation" side of the coffee community? The only one I can identify is the "snobby" coffee community (you know the one), and the rest being mostly just a refrained version of that.

Compare that to the homebrewing community, you have the snobbs (the mead community is infamous), but then there are the "prison hoochers", turning anything containing sugar into alcohol.

Where are the mavericks who perform the important societal task of discerning if "is coffee and cheeto-spice a good combo?" and "what happens if you brew coffee with red bull?"

On a more serious note it would be great so more people try different ways to spice coffee, instead of just trying to brew the flatest, "perfect" brew. I've found adding some fruity black tea to my coffee in a French press to work really well.

9


Currently using an antique hand grinder for coffee beans and would like to know what fine coffee is supposed to look and feel like to see if the antique grinder is up to snuff

10


Having recently graduated from instant coffee and currently being stuck with using using tea infuser to make coffee I'd like to know what to look for when doing research on coffee machines

If location is relevant I'm in Queensland, Australia

Edit: got a breville barista express

11


The Mk4 and some other handheld grinders are meant to have some static charge to catch fines. I typically find that some fines are indeed stuck to the plastic capsule and that quite a bit of hull material tends to stick to the bottom of the grinder. There is also some appropriately sized grind material intermixed especially with the hull material and often a little that sticks to the plastic capsule. For this grinder or others with similar features, I'm curious how aggressive folks are with emptying? Just a gentle dump of the capsule leaving a solid gram or more of material stuck to the grinder (do you compensate recipes at all for this?)? Light tap to dislodge a bit? Multiple taps to get as much off as possible especially from metallic portion of grinder? Also, I've always been a fan of RDT, but that is supposed to reduce static and the Mk4 design is to utilize static to catch fines. Thoughts on whether it's a good idea or not for this grinder? Interested to hear your routine be it scientific/theoretical or just habitual. Thx.

12


https://i.postimg.cc/SRsqP621/manual-grinds.jpg

It was in pretty good shape to begin with, but I cleaned it and ground some coffee and it worked great! The top nut adjusts the granule size and made it pretty fine when I tightened it.

Any of you have an older grinder that you enjoy using or tips for using them?

13
14


I've recently been doing some instant coffee with milk and it is really fucking good. Around February I wanted a bit of a classic snack the way my grandparents would, some sweet bread with instant coffee. So I got myself some. I had forgotten the powdered creamer, so I used milk. I was pleasantly surprised.

15


Just wanted to share a little delight that might breathe a little excitement back into your dripper if you haven't tried it before.

I don't recommend it on the daily (the cleanup can get tedious and the cafestol / kahweol probably would get to be a bit much), but for an occasional weekend treat I like to put a #4 Coffee Sock into my Moccamaster (or dripper of your preference). You may need to adjust your grind size just a little bit coarser, and you'll wet and squeeze excess water out of the sock beforehand. Otherwise, ratios, process, etc. should be about the same. Expect a little richer, sweeter cup with more body.

Cleanup: If you are new to reusable cloth filters or have given up in the past due to issues with cleanup, please consider the following which is derived from trying many different techniques - all of which have been disappointing save this. If possible leave the grounds to cool and dry a bit after brewing (1-2h). Invert and empty grounds, then give the sock a good rinse out. Squeeze out excess water, fold it up, place in a ziplock and minimize air while sealing. Hash-mark each use with a sharpie onto the ziplock and put directly into the freezer. I've tried half a dozen non freezer based storage methods and they have all led to weird, presumably mold-based flavors sadly introduced into my brews. It's surprising to me the coffee sock manufacturers do not recommend freezing (note: freeze/ thawing may wear down the fiber structure of your filter faster, but c'est la vie). After 10 or so brews or if you are getting any unexpected bitter notes, it's time to boil some Cafiza (or urnex, or whatever you prefer) and let your sock soak in that for 10 minutes before giving it a thorough rinse-out.

16
17


I'm trying to pull manual shots from my Breville Bambino, and it simply isn't working. I'm following the steps in the manual. (Press and hold the double-shot button for pre-infusion, then release it for the extraction to start, and then press again to stop.) The issue is, the machine stops midway, before I press the button. Seems like it's doing the pre-programmed double shot volume, and stopping after that. Does anyone has experience pulling manual shots from this machine? Should I contact Breville for a repair?

Edit: It fixed itself after performing a factory reset.

18


I got myself a V60 (along with the honker kettle) in order to finally enjoy lighter roasts. I already have a timemore grinder and a mid range lelit espresso machine so I just wanted something to cleanse my palate and explore more varieties of coffees.

Currently I use the 15g coffee in, 5 pours ending with total of 250g over 3 minutes. I have modified the method to have more sweetness by pouring more water on second pour than rest. Pouring in a spiral motion going from center.

What are some other must know tips and core logic? What changes the flavor and what doesn't?

19


Hi there, hope everyone is have a good weekend!

Got a general question regarding these types of coffee bags, that I keep getting with my coffee beans whenever I buy some from my local roaster. But honestly not sure what they're for...? Currently just using them as my lunch bags for work haha.

Let me know if they have a more specific use case!

20


I wanted to try a moka pot, so I went back to this thrift store where I had seen some before, and of course they were all gone.

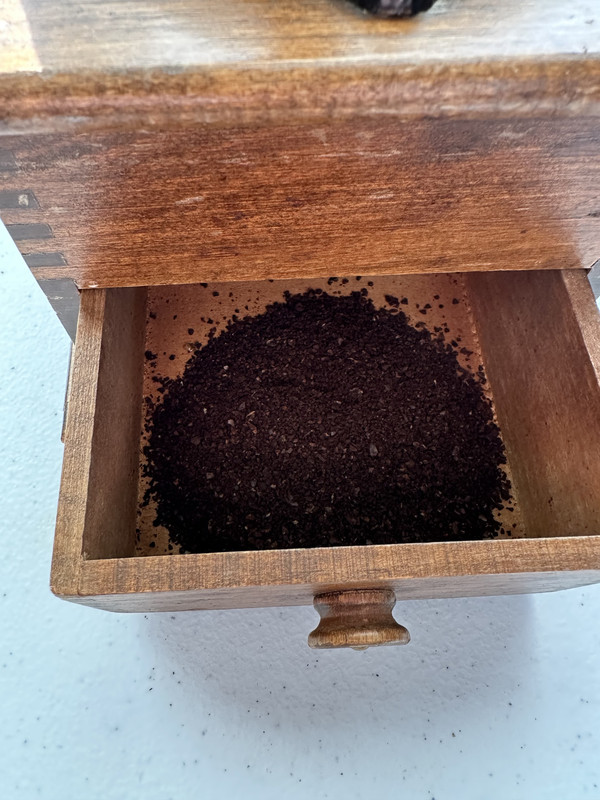
After a lot of browsing, I came across this thing that looked suspiciously coffee gadget-like, looked up the manufacturer Ilsa, and it turns out to be a Neapolitan coffee maker, 1-2 cups.

Ilsa doesn't make this particular model anymore. Their current lineup of Neapolitan coffee brewers have long handles or plastic handles.

This is for good reason, because the whole brewer is supposed to go on a stovetop to boil, and the bar handles on mine were quite hot when it reached boiling.

I did watch some videos on how to use this thing, and in one of them, a coffee vendor in Naples has a pot that doesn't have any handles at all, so he just uses a towel to handle it after heating. That is what I wound up doing.

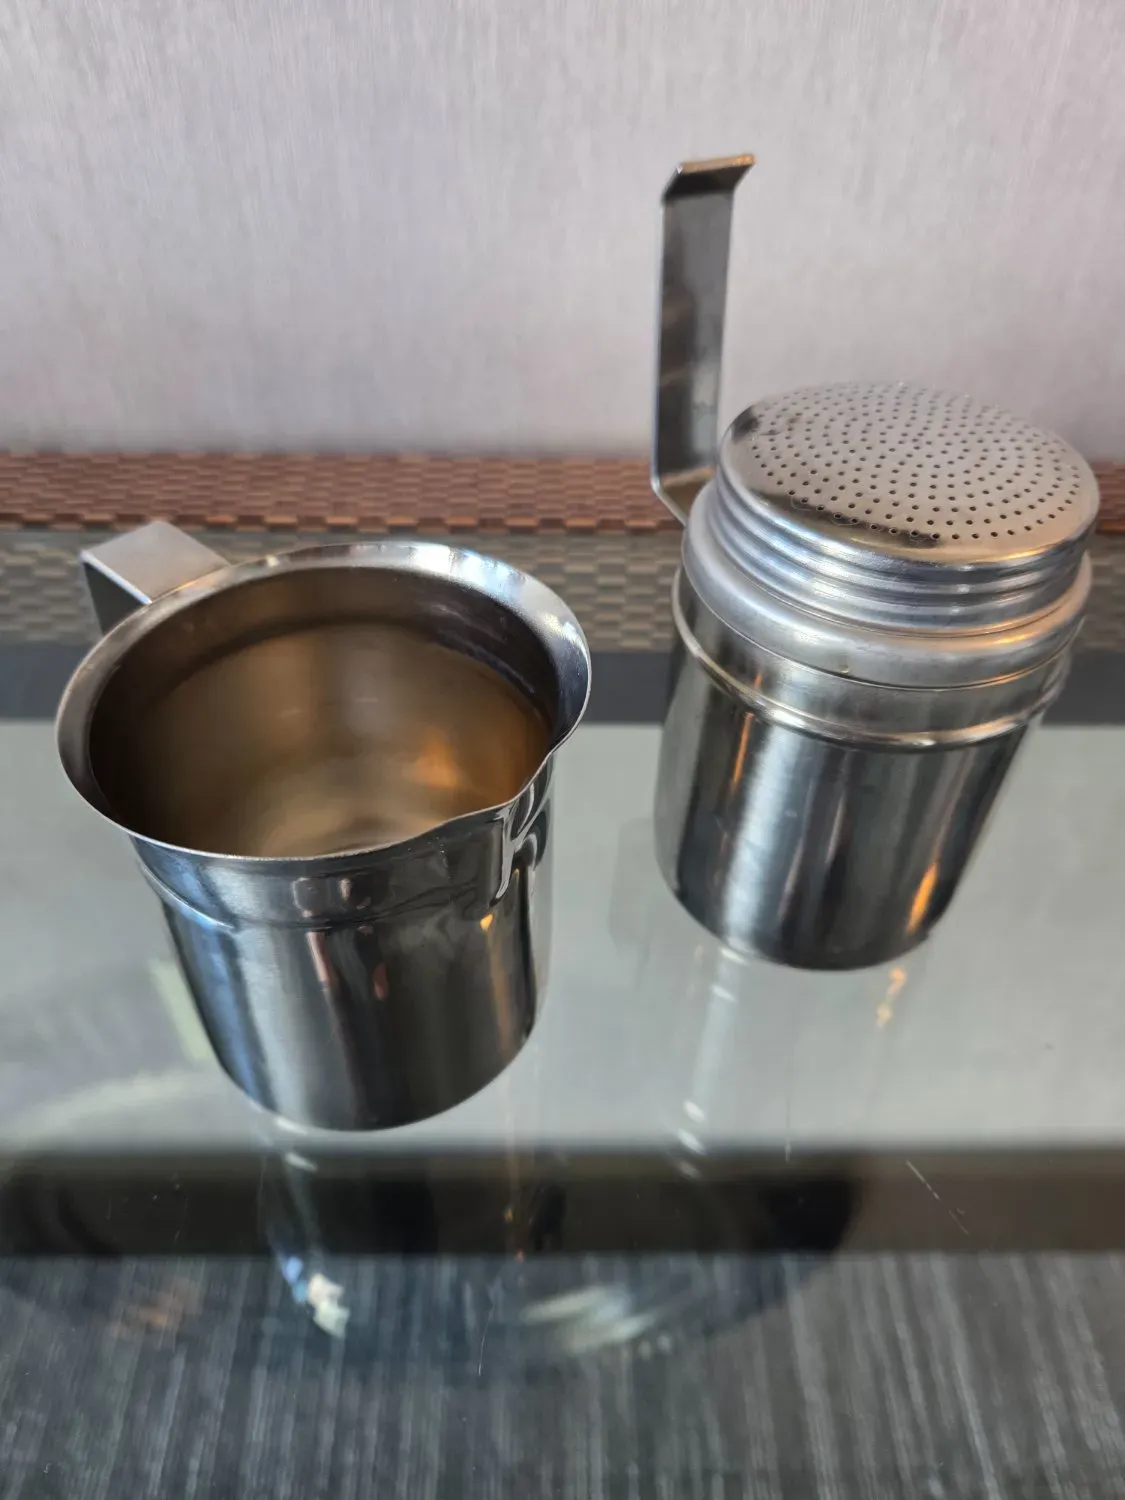
The way the steel bar handles interlock to keep everything together, and the lack of a long spout as seen on their current models, make me suspect that my brewer was designed to be packed for travel.

Twisting the assembled brewer to interlock the handles does feel quite satisfying...

More pictures:

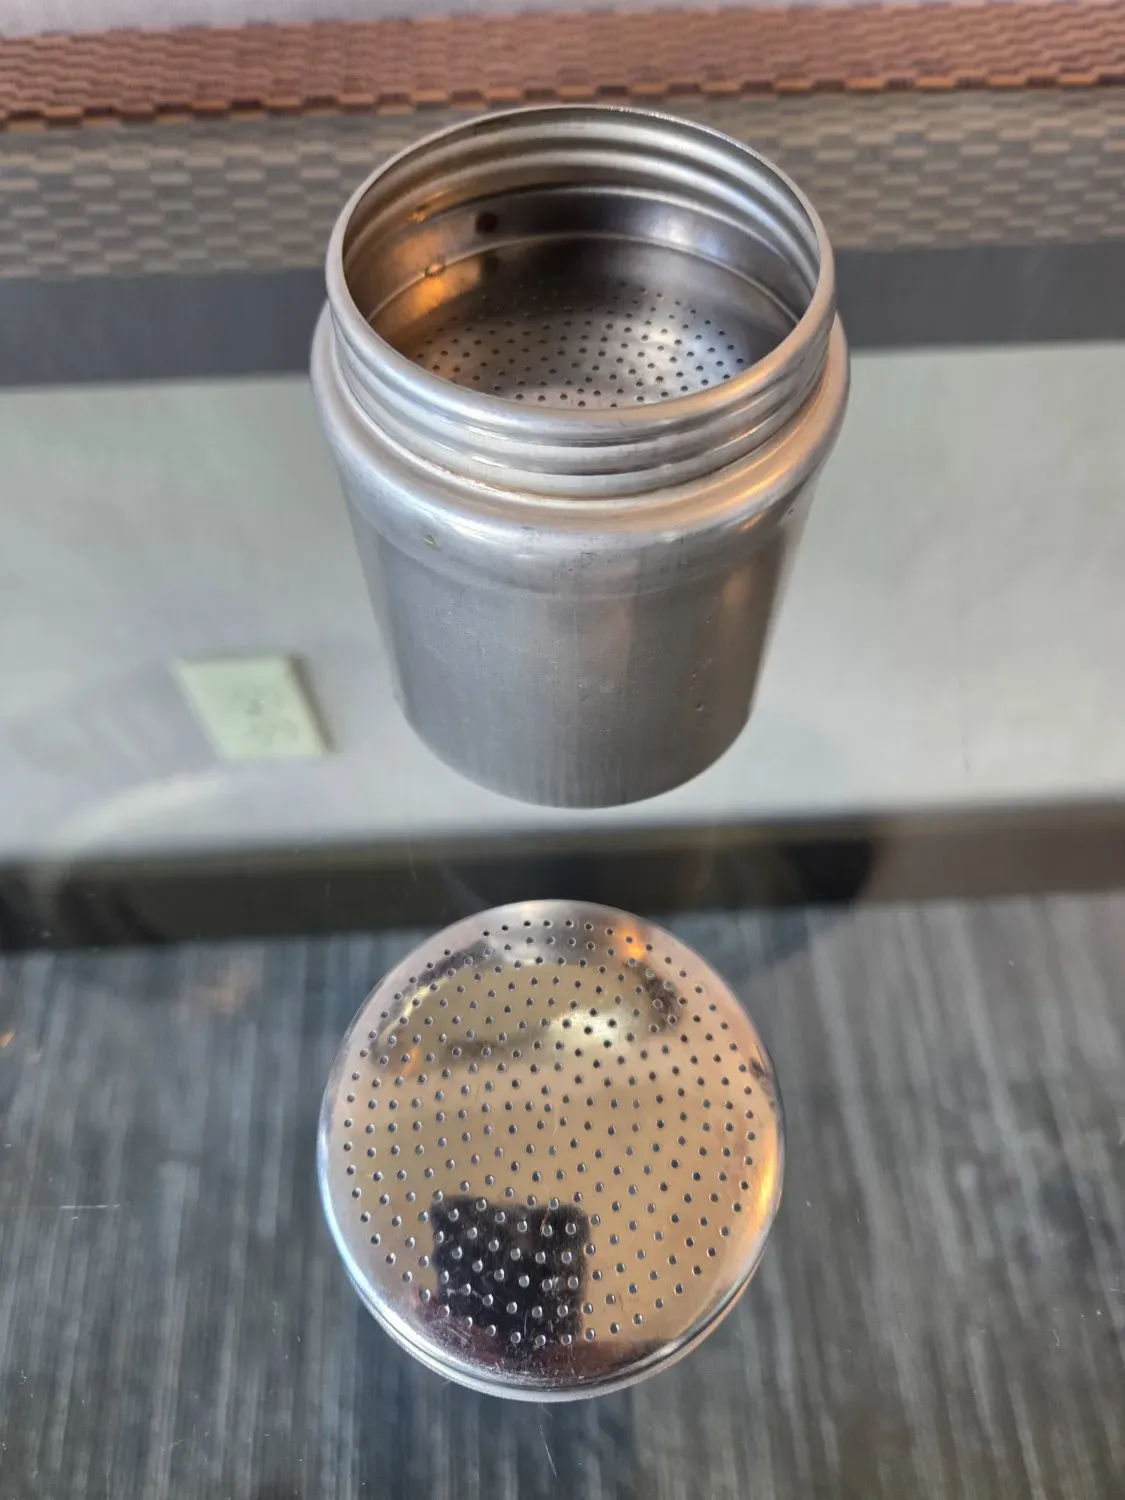
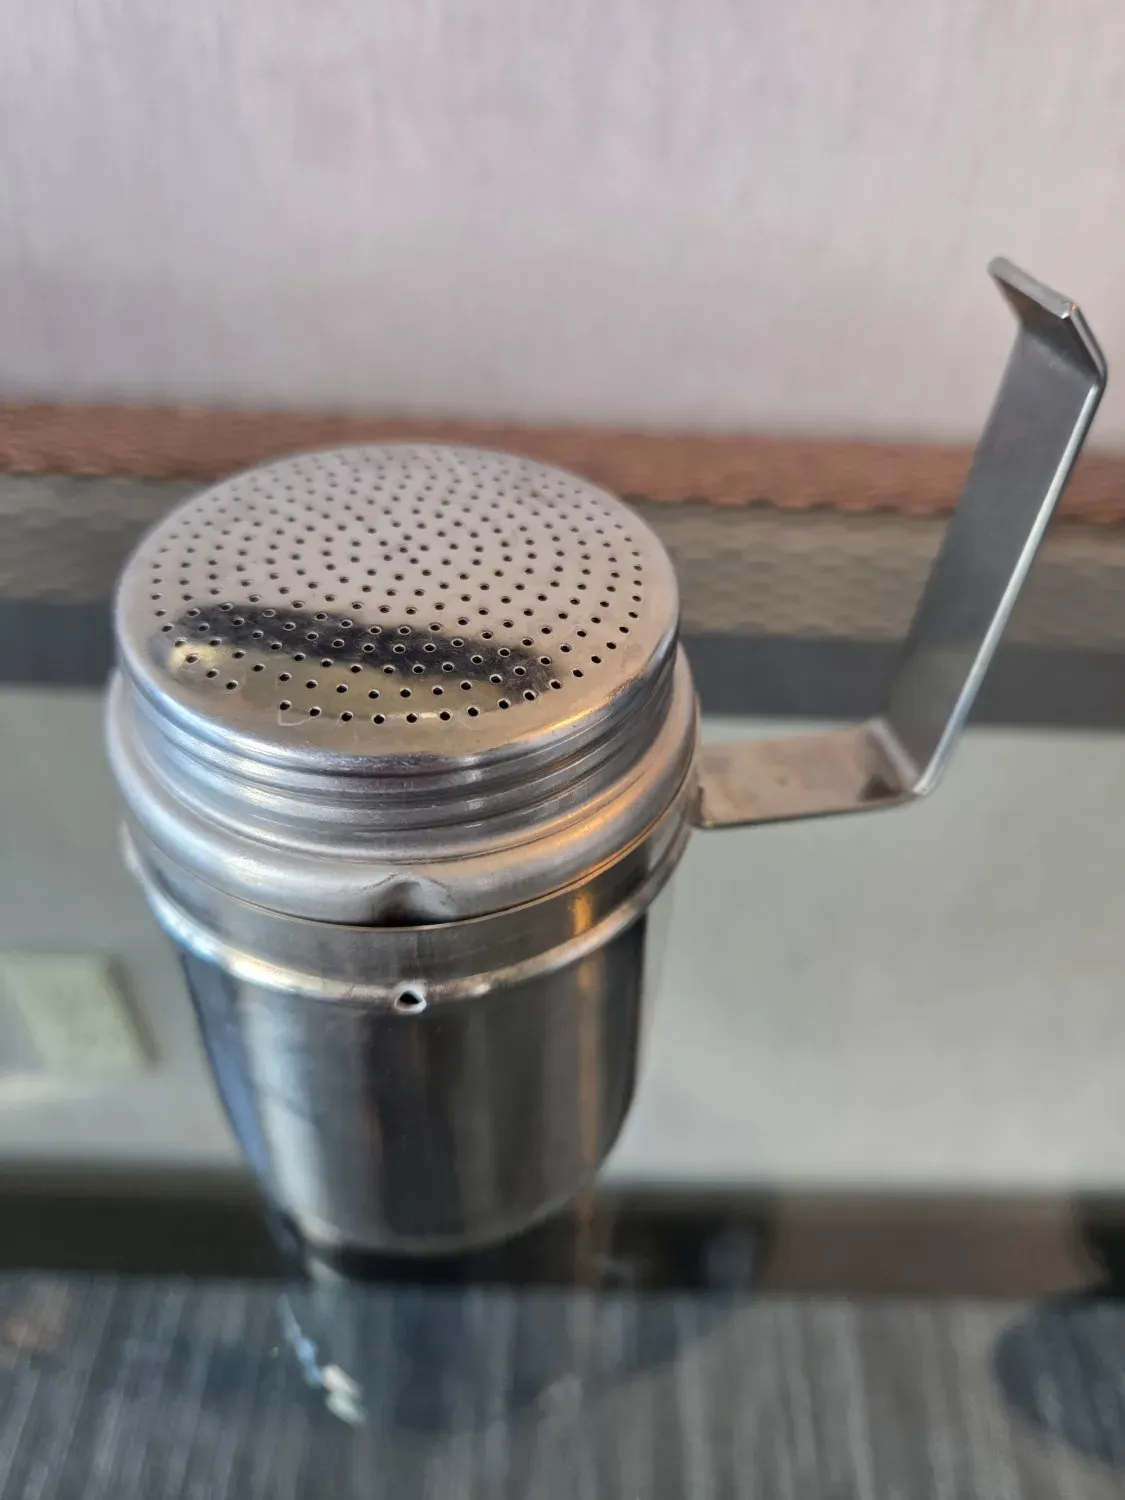
P.s. These Neapolitan brewers are supposed to have a little dent in the filter's side.

When installing the filter into the water tank, align the filter dent with a tiny hole in the side of the tank.

This allows boiling water and steam to escape and make a sputtering sound .

This sound signals that the water is boiling, and that the brewer is ready to be flipped.

But does it brew coffee? Yes it does, and very strong coffee by my French press and Aeropress standards. I'm still feeling a bit jittery here in the afternoon.

The taste was nice and smooth with my current dark roast grounds, but it turned out less hot than I like, so I'll have to work on my process...

A few fines came through. Nothing that my regular French press doesn't also let through.

According to my research of watching lots of YouTube videos, the Neapolitan tradition is to only use dark roasted grounds in this type of brewer.

Edit: After researching this type of brewer, I believe that I am missing the lid.

If you look at the post photo, the top of the brewer, i.e. the bottom of the water tank, is slightly indented all the way around. That is where I believe the lid is supposed to be attached when the brewer is stored.

The lid is not super critical to the brewing process. It is used to cover the serving part with the pouring spout, after the tank and filter have been removed, presumably to retain some temperature.

I suspect that the lack of a defined long spout to put a little paper cone over made this model unpopular with the natives in Napoli too.

21
22


A Roastery located in Galbiate, LC, Italy strongly focused on ethical values, particularly the collective property of the means of production and the shared work management They import from small business, through supportive supply chains as a way to fight against the exploitation of workers and of the environment. Also they are part of the Red Pro Zapa, which supports the Zapatista movement in Chiavas, Mexico, and The Roasters United

Coffee-wise: the have a fair range a of coffees, from blends to specialty single origins, and also a decaf single origin. Some single origins and the decaf are from Chiavas.

Since they ships order with a minimum of 40€ I orders basically all their single origins and decaf. I think I’ll make a post as soon as I get to taste them

23


Just started experimenting with cold brew. I noticed the extremely low water ratio of 1:4 as compared to your garden variety manual pourover of 1:15 to 1:18. Is it as thick as I imagine it would?

How much do you usually make in a single batch? How much (before diluting) would you put in a single serving?

24


Moving from Porlex II to Kingrinder K6
So, I was perfectly happy with my Porlex mini II, as a I love specialty coffee but I definitely don’t understand yet the small nuances in coffee brewing.
But a couple of days ago my sister accidentally broke the ceramic burr. I was going to just buy the burr but I instead made a little research, suspecting I could get a better grinder. Eventually I landed on the Kingrinder K6 and I was able to receive it the very following day.

So, I’m using for just a couple of days, but the difference is immense.
The object itself is much bigger and HEAVIER, I couldn’t believe how much more robust it felt. Also is far more complex and sophisticated in its assembly, and the structure is more stable.

It’s very handy, firstly because it can easily grind much more coffee, much more quickly and easily. It also features the external grinding size adjustment with precise clicks easy to check thanks to the marks on the outside.

But the main difference is the resulting ground. At a first look it does look more evenly sized but you can’t really be sure. By just brewing it with a V60 the difference couldn’t be clearer.
With the Porlex, the coffee ground after brewing featured a mud-like smooth layer covering both the paper and the coarser particles. It almost disappeared with the K6, only the coarser ground is visible now. Also the brewing time got shorter, especially when brewing two cups of coffee at a time (500ml of water for 30g of coffee).

The only downside is the maintenance. The Porlex burr is made of ceramics, you can easily wash them with a toothbrush and water and make it completely white and clean again.
The K6 burr is made of metal, the manual strongly recommends to avoid water and just brush it, however due to the complexity of the mechanisms it takes a bit longer to disassemble it and definitely more hustle to reassemble it. In particular it requires a very tiny piece to be put back in place in the end which is particularly annoying. I think it may be a huge problem for people with lower hand mobility and strength, so I would appreciate if this process were a bit more accessible.

In a nutshell, it costs like 20€ more than Porlex but looks like a completely different category. I couldn’t recommend it more

#coffee
@coffee@lemmy.world
@coffee@a.gup.pe

25


I understand that the Aeropress is by no means the best way to make coffee, but I'd like to think I've got a good thing going with it. It's certainly a step up from the "throw x bulk preground brand from the store into the dripper", though. And it's a cheaper method, which is okay by me.

I've come to love it. I make coffee, loose leaf tea, and yerba in it, depending on what I feel that morning. For those of you that use the Aeropress, I'd like to share a sort of frankenstein recipe I made as well as hear some of yours to try out. My recipe is a combination of two champion's recipes with my own coffee measurements. According to an assortment of coffee calculators, I should be using nearly double the amount of ground coffee that I do, but I can get a great flavor and strength with a lesser amount of beans.

My Frankenstein Aeropress Recipe (Americano, Inverted Method, Standard Aeropress Size)

Makes: 20oz (US standard/ 591ml)

  • Grind 25 grams of beans. The grind size will vary between roasts, but usually I do somewhere between espresso and drip on the Hario Skerton Pro for a true medium roast.
  • Boil water to exactly 194f/90c. An electric kettle with temp setting helps immensely here.
  • Invert your Aeropress and place your grounded material in. Add just a slight bit of water, enough to cover the grounds. This may take some getting used to; you can start small and keep adding bit by bit to get what you need. I still sometimes over-fill. Stir with a spoon until you get what I like to call a "wet concrete" consistency (not the best analogy, but...). Make sure all your ground material is wet.
  • Let sit/bloom for one minute. If your roast is very fresh, you may notice your coffee rise and take on a sort of half-baked brownie appearance.
  • After one minute, stir generously almost like a dough. If it's a darker roast or not as fresh, it may just make a sort of silky liquid. If it's more of a dryer concrete consistency, use a bit of chopping with your spoon and fold. Do this for just a bit.
  • Add water until filled to the top of the press. Be VERY careful here. I can get it right to the lip without spilling, but a little extra air will not hurt. Please do not burn yourself.
  • Stir again after filled and set a timer for two and a half minutes.
  • During these minutes, get your filter in the cap and wet it with water. This doesn't change the flavor, but rather keeps the filter from slipping out when using the inverted method.
  • When your brew timer is up, stir again. If you like a more bitter coffee, try to dip some of the foam from the top into the mixture. Alternatively, if you like a sweeter coffee you can place a napkin on top and soak up the foam (I did this by accident when I spilled a bit on the stir).
  • Place your filter cap on and put your mug over the Aeropress. Flip both (be very very VERY careful). After the Aeropress is safely on top, shake it a little to get any leftover grounds off the plunger.
  • Let the coffee settle for about twenty or so seconds.
  • Slide the Aeropress left and right then back and forward to even the material for the plunge.
  • Plunge slowly. This part is a bit of work, since the Aeropress wasn't really designed for this much ground material. When you hear the hiss of air, stop plunging. Plunge the little bit of leftover air into the sink and empty your Aeropress into the trash.
  • Add your desired sugar and cream. Fill almost to the top with your hot water and add a bit of cold water until you get your desired drinking temp.
  • Stir and enjoy.

I've found that this makes a very flavorful cup of coffee, despite using only 2/3 the suggested amount of beans to make it according to Aeropress calculators. I have not tried this recipe as a regular espresso; I haven't reached that peak of coffee enjoyment yet, having only started getting back into it in the past year. I can't remember the names of the champions that I mixed up this recipe from, but it also takes some steps from a few tip tutorials.

I will probably be switching to pour over at some point, because the amount of requests I'm getting from friends and family for coffee is getting overwhelming for the amount this makes. As a note, this method works great for loose leaf tea. Take your tea steep time and cut off a minute for steeping in just a bit of water, just like blooming. This ensures that the tea leaves stay at the bottom of the Aeropress when adding the rest of your water. So for black tea (4 minutes and 30 seconds recommended steep time) I do one minute for the "bloom" and then three and a half minutes for the steep at full water (212f/100c). I usually do 2 grams of tea for each 6 oz of water.

If you're unaccustomed to or have never heard of the inverted method, please take a moment to look up and watch how it's done. Hot water is no joke, save yourself from possible skin grafts. It is more than okay to use these measurements and timings using the regular method. Alternatively, you could use the Fellow Prismo to the same effect as inverting.

view more: next ›